VMware Aria Automation Deployment and Configure- 8.12
Basic Overview :
Using VRA Easy installer ISO, we can deploy – vRealize identity manager, vRealize Suite Lifecycle Manager, and vRealize Automation.
* Install vRealize Suite Lifecycle Manager
* Install a new instance of VMware Identity Manager
* Install a new instance of vRealize Automation
* Register vRealize Automation with VMware Identity Manager
* Install a new instance of vRealize Automation
* Register vRealize Automation with VMware Identity Manager
Let's Discuss about - vRealize Automation (VRA) , vRealize Lifecycle Manager (VRLCM) and vRealize Identity Manager (VIDM)
vRealize Life Cycle Manager: – VMware vRealize Suite Lifecycle Manager delivers a comprehensive, integrated product and lifecycle management solution for VMware vRealize Suite.
vRealize Identity Manager (VIDM): – Identity Manager is integrated into the vRealize Automation appliance and provides tenant identity management. Identity Manager synchronizes with the Active Directory domain.
vRealize Automation (VRA) (New name – VMware Aria Automation): –VRA is a modern infrastructure automation platform with event-driven state management. It is designated to help organizations control and secure self-service multi-cloud with governance and DevOps-based infrastructure delivery.
Now Let's Discuss vRealize Component :
2. Code Stream : Code Stream automates the application and infrastructure delivery process with release pipeline management, including visibility and analytics into active
pipelines and their status for troubleshooting. It allows DevOps teams to leverage existing tools and processes with out-of-the-box integration.
3. vRealize Orchestrator : vRealize Orchestrator simplifies and automates complex data center infrastructure tasks, delivering consistent remediation of issues, extensibility and fast service delivery.
4.Service Broker : Service Broker aggregates content from multiple resources and platforms, including Cloud Assembly, vRealize Orchestrator, and native public clouds, into a common catalog accessible via a graphical interface or APIs. It provides a self-service model with flexible, policy-based governance to regulate service and resource consumption.
5.vRealize Automation SaltStack Config : SaltStack Config can easily define optimized, compliant software states and enforce them across your entire environment—virtualized, hybrid or public.
Resource Requirement for the Deployment of VRA , VIDM and vRSLCM .
Network Requirements:
* vRealize Automation requires:Single, static IPv4 and Network Address
* Reachable DNS server set manually
* Valid, Fully qualified domain name, set manually that can be resolved both forward and in reverse through the DNS server
Requirement for Ports for Product and Integration Communications
pipelines and their status for troubleshooting. It allows DevOps teams to leverage existing tools and processes with out-of-the-box integration.
* Reachable DNS server set manually
* Valid, Fully qualified domain name, set manually that can be resolved both forward and in reverse through the DNS server
Deployment Process :
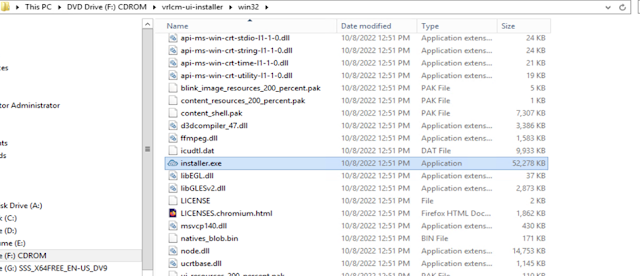
1. First Download the Easy installer ISO which contain VRA,VRSLCM and VIDM bundle .2. Mount the vra-lcm-installer-xxx.iso image on the local system and navigate to the installer file location.
8. It will pop up for certificate warning, Click Accept to continue.
Network configuration ( IP Assisment,Subnet mask ,gateway and DNS Details.)
(If you want HA, you can choose cluster deployment)> Next.
* Also ,Configure the Environment Name, License key, vRAs node Name, IP and Hostname and Click Next.
It will take some time to complete the deployment .
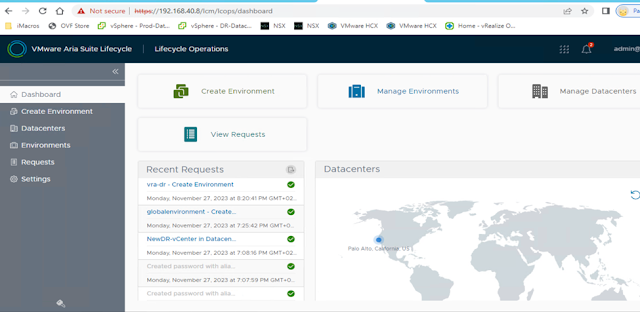
19.Once the installation is finish and LCM is deployed you can access it from the IP / FQDN and check the progress of the other component in detail.
Now we can able to access the LCM and configure the Environment .
3.You can also login to VMware Aria Automation and VMware identity manager that everything is deployed successfully .
4.Go to browser and provide IP/fqdn of VMware Aria Automation and go to Login page .
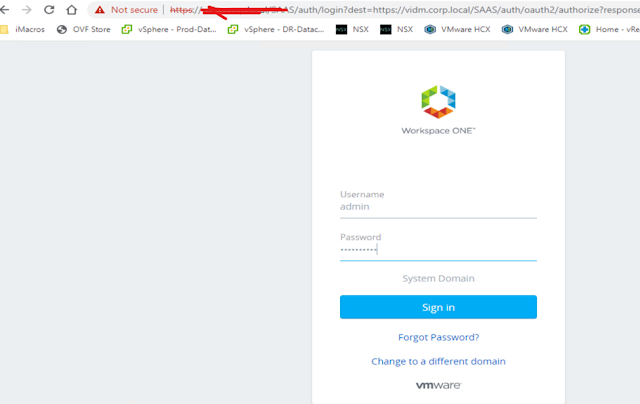
7.Now you can go to browser and provide IP/Fqdn detail of VIDM and login with admin and password.
Once you will be able to login you can integrate VIDM with Active directory or LDAP to syn user from domain .
Hope This post will helpful for the deployment of VMware Aria Automation .Thank you for Reading this Post .


No comments:
Post a Comment